 Valorant Insights Improve your Valorant Gaming Skills with us!

By Jackober, Diamond 2 Valorant Player with 1,000+ hours of gameplay
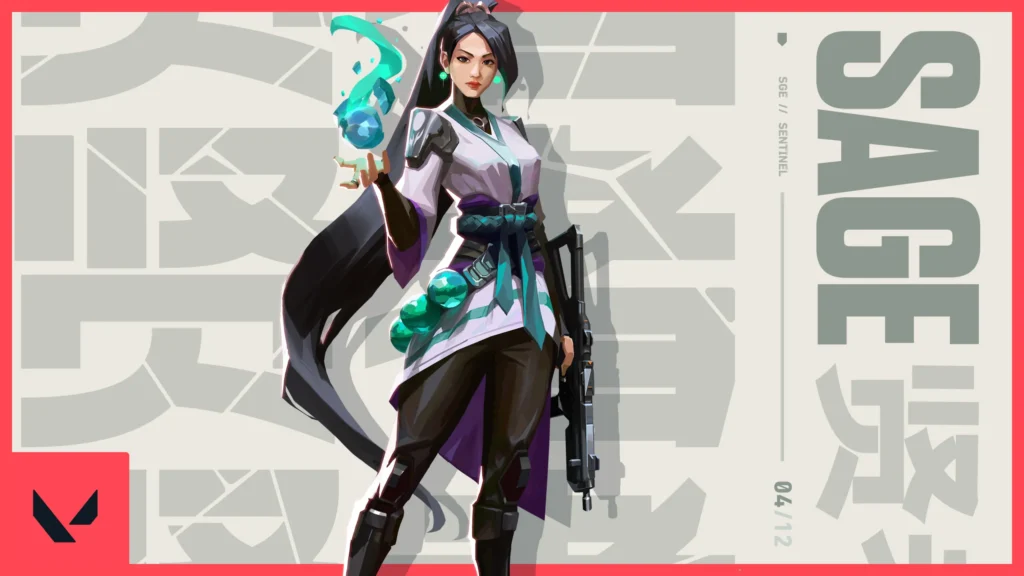
Sage: The Radiantly Supportive Sentinel
As a Diamond 2 player with over 1,000 hours in Valorant, I’ve played alongside and against countless Sages. I’ve witnessed the frustration of facing a Sage who perfectly controls site entry with her slows, creates unexpected angles with her wall, and swings momentum with clutch resurrections. I’ve also seen many players fail to unlock Sage’s full potential, using her as a passive healer when she offers so much more.
Sage is one of Valorant’s original agents and remains one of the most influential characters in the game. Classified as a Sentinel, her kit revolves around healing, area denial, and resurrection capabilities that can dramatically impact round outcomes. While she might seem straightforward to beginners, mastering Sage involves understanding complex decision-making, creative utility usage, and strategic thinking that separates good Sages from great ones.
In this guide, I’ll walk you through everything you need to know about playing Sage effectively in today’s Valorant meta. From basic ability usage to advanced wall techniques, from defensive setups to aggressive plays, and from solo queue strategies to team coordination, this guide will equip you with the knowledge to maximize Sage’s impact in your matches. Whether you’re a beginner looking to learn your first Sentinel or an experienced player aiming to refine your Sage gameplay, this guide will help you elevate your performance with Valorant’s premier healer.
Understanding Sage’s Abilities
Before diving into strategies, let’s break down Sage’s abilities and understand the fundamental mechanics behind each one.
Basic Ability: Barrier Orb (C)
Ability Description: Sage creates a large, solid wall that blocks movement and bullets.
Key Mechanics:
- Wall lasts for 40 seconds if not destroyed
- Has 800 HP which is displayed when targeting enemies
- Can be placed at range or directly beneath Sage
- Can be rotated before placement for different angles
- Briefly slows enemies who touch it
Cost: 400 credits
The Barrier Orb is one of Sage’s most versatile and impactful abilities, useful for both defense and offense. Understanding its placement options and durability is crucial for maximizing its effectiveness.
Basic Ability: Slow Orb (Q)
Ability Description: Sage throws an orb that creates a slowing field upon impact.
Key Mechanics:
- Slowing effect lasts for 7 seconds
- Affects both enemies and allies (including Sage)
- Creates an audible crystal sound when enemies walk through it
- Can bounce off walls for extended placement range
- Reduces movement speed and jump height significantly
Cost: 200 credits (2 charges)
Slow Orbs are essential for area denial and information gathering, making them invaluable for both site defense and post-plant situations.
Signature Ability: Healing Orb (E)
Ability Description: Sage heals an ally or herself over a short duration.
Key Mechanics:
- Heals 60 HP over 5 seconds
- Has a 45-second cooldown
- Can target any ally within line of sight and range
- Cannot overheal beyond 100 HP
- Visual and audio indicators reveal healing is in progress
Cost: Free (recharges after cooldown)
The Healing Orb is Sage’s defining ability and the primary reason she’s considered a support agent. Proper heal timing and target selection are crucial skills for any Sage player.
Ultimate Ability: Resurrection (X)
Ability Description: Sage revives a dead ally with full health.
Key Mechanics:
- Requires 8 ultimate points
- Must be within close range of ally’s death location
- Takes approximately 3 seconds to complete
- Revived ally returns with full health
- Creates very noticeable visual and audio cues
Cost: 8 ultimate points
Resurrection is one of the most powerful ultimates in Valorant, capable of completely shifting round momentum. Using it effectively requires careful timing and decision-making.
Sage’s Role in Team Composition
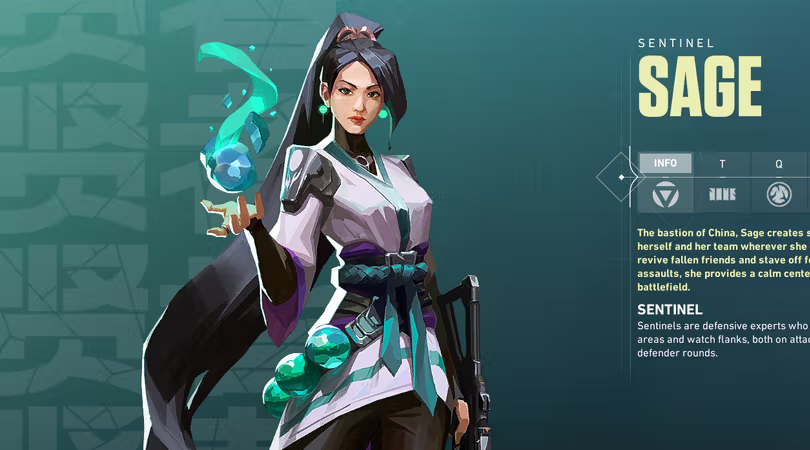
Understanding Sage’s place in the team is essential for maximizing her effectiveness. As a Sentinel, Sage’s primary role is to secure and control space, but her healing and resurrection capabilities add a unique support dimension.
Core Responsibilities
- Site Anchoring: As a Sentinel, Sage excels at holding down sites and delaying pushes.
- Team Support: Providing healing to injured teammates and potentially resurrecting fallen allies.
- Space Control: Using walls and slows to deny enemy movement and create favorable engagements.
- Information Gathering: Using utility to detect enemy positions and movements.
Team Composition Synergies
Sage works particularly well with:
- Aggressive Duelists: Agents like Jett and Reyna who take fights can fall back for heals and re-engage.
- Initiators with Self-Damage: Agents like Sova or Breach who might damage themselves with utility benefit from healing.
- Other Sentinels: Pairing with Killjoy or Chamber creates extremely difficult sites to take.
- Controllers with Limited Mobility: Brimstone and Viper appreciate Sage walls to complement their smokes.
While Sage can work in virtually any composition, she particularly shines in setups that leverage her healing to sustain aggressive plays or in defensive compositions that maximize site control.
For more insights on agent synergies, you might want to explore guides on complementary agents like Clove or Tejo to understand how they interact with Sage’s kit.
Basic Sage Strategies for Beginners
If you’re new to Sage or have just created a Valorant account, these fundamental strategies will help you provide immediate value to your team.
Defensive Fundamentals
- Default Wall Placements: Learn the standard wall placements for each site to block main entry points:
- Haven A: Wall off A Short or A Long
- Bind B: Wall off B Main
- Ascent B: Wall off B Main
- Split B: Wall off B Main
- Slow Orb Usage: Place slows at choke points when you hear enemies approaching:
- Throw them slightly behind corners so enemies walk into them
- Use them to delay pushes while waiting for rotations
- Place them where they’re not easily spotted before enemies commit
- Healing Priority: Develop a basic healing priority system:
- Heal duelists who are actively taking space
- Heal teammates who are below 40 HP first
- Don’t heal if it puts you in immediate danger
- Remember you can heal yourself when needed
- Basic Resurrection Safety:
- Only resurrect when the area is clear or covered by teammates
- Prioritize resurrecting duelists or players with valuable utility
- Don’t resurrect in the open where both you and the revived player are vulnerable
Offensive Fundamentals
- Entry Support:
- Follow your duelists closely to heal them after initial engagements
- Place walls to block common defender positions after site entry
- Use slows to prevent retakes from common flanking routes
- Post-Plant Walls:
- Wall off the spike to make defusing difficult
- Create off-angle walls that force defenders into awkward positions
- Use walls to block common retake paths
- Resurrection Value:
- Resurrect teammates in post-plant situations to maintain numbers advantage
- Consider waiting until after the initial site take to use resurrection safely
- Communicate with your team to cover you while resurrecting
Economy Management
- Ability Prioritization:
- Always buy wall on full-buy rounds
- Consider saving wall on eco rounds
- Slow orbs provide excellent value and should be purchased when possible
- Ultimate Economy:
- Communicate your ultimate status to coordinate with team
- Pick up ultimate orbs when safe to do so
- Consider playing more aggressively when your ultimate is ready to maximize resurrection value
These fundamentals will provide a solid foundation for new Sage players. As you grow more comfortable with these basics, you can begin incorporating more advanced techniques.
Advanced Wall Techniques
One of the biggest differentiators between average and exceptional Sage players is their creative and effective use of the Barrier Orb. Here are advanced wall techniques that will elevate your Sage gameplay:
Boosting Techniques
- Self-Boost Walls:
- Place a wall beneath yourself to reach unexpected angles
- Examples: Boost to Haven A Heaven, Ascent Mid Top, Split A Rafters
- Practice placing the wall slightly in front of you while jumping for maximum height
- Teammate Boosts:
- Coordinate with Jett, Raze, or Omen to place them in even more unexpected positions
- Example: Boost a Chamber to an off-angle on Bind B
- Timing Boosts:
- Wait until enemies are committed to a push before revealing your boosted position
- Use these boosts sparingly to maintain the surprise factor
Offensive Wall Strategies
- Site Entry Walls:
- Wall off common defender positions during executes
- Examples: Wall off Heaven on Split A, CT on Bind B
- Time these walls with your team’s entry to maximize effectiveness
- Mid-Round Isolation Walls:
- Split defending teams by walling between their positions
- Example: Wall between site and heaven to isolate defenders
- Communicate with your team to focus the isolated defender
- Spike Plant Facilitators:
- Wall off dangerous angles to create safe plant spots
- Example: Wall off Hookah on Bind B to plant safely for CT
- Coordinate with your team to cover other angles while planting
Defensive Wall Innovations
- Off-Angle Walls:
- Instead of blocking entrances directly, create walls that force awkward engagements
- Example: Diagonal wall on Ascent A Main that forces attackers to clear unusual angles
- These walls often yield more value than standard blocks
- Bait Walls:
- Place walls with small gaps that tempt enemies to spam or push through
- Position yourself to punish enemies who focus on breaking the wall
- Use these to waste enemy time and resources
- Retake Walls:
- Save walls for retake scenarios when appropriate
- Create paths through defender setups with strategic wall placements
- Example: Wall from Heaven to Site on Haven C to create safe passage
Wall Timing and Adaptation
- Delayed Walls:
- Wait until enemies commit to a push before placing walls
- This prevents them from easily adapting their strategy
- Listen for ability usage before placing your wall
- Wall Replacement:
- When a wall is broken, consider immediately replacing it in a slightly different position
- This can catch enemies off-guard who thought they created an opening
- Only do this when you have control of the area to avoid wasting credits
- Map Control Walls:
- Use walls to take control of key map areas
- Example: Wall off Middle on Split to secure A Main control
- Coordinate with your team to capitalize on the space created
The key to mastering Sage’s wall is constant innovation and adaptation. Study how enemies react to your walls and adjust accordingly in future rounds.
Maximizing Healing Impact
Sage’s healing is straightforward mechanically but requires sophisticated decision-making to maximize value. Here’s how to optimize your healing:
Strategic Healing Targets
- Priority Framework:
- Highest Priority: Duelists actively taking space (Jett, Reyna, Raze)
- High Priority: Initiators with crucial utility remaining (Sova with drone/dart)
- Medium Priority: Controllers holding key positions
- Lower Priority: Other Sentinels or players in passive positions
- Lowest Priority: Yourself (unless you’re actively anchoring a site)
- Situational Adjustments:
- In post-plant, prioritize players watching flanks or holding key angles
- During retakes, prioritize players with utility needed for execution
- When holding a site, prioritize the player in the more exposed position
Healing Timing
- Proactive vs. Reactive Healing:
- Proactive: Heal before a player re-engages (ideal)
- Reactive: Heal immediately after a player takes damage (common)
- Anticipatory: Heal based on expected engagements (advanced)
- Cooldown Management:
- Track your healing cooldown mentally (45 seconds)
- Communicate to your team when your heal is available
- Consider positioning near injured teammates as your heal comes off cooldown
- Round-Phase Healing:
- Early Round: Be conservative with healing to maintain the option
- Mid-Round: Heal to sustain map control and positioning
- Late Round: Heal to maximize survival chances in clutch situations
Self-Healing Optimization
- When to Self-Heal:
- When holding a critical position alone
- When no teammates are below 40 HP
- When you need to take an upcoming duel
- After using your wall to reposition
- Positioning for Self-Healing:
- Fall back to safety before healing
- Use your wall to create safe healing spots
- Consider the 5-second healing duration when choosing position
Communication Around Healing
- Proactive Communication:
- Call out when your heal is available: “Heal ready”
- Call out when you’re healing someone: “Healing Jett”
- Call out cooldown status when asked: “Heal in 20 seconds”
- Receiving Requests:
- Ask injured players to get to safety before healing
- Prioritize based on the framework, not just who asks first
- Be clear when you cannot safely heal someone
Proper healing alone can dramatically increase your team’s effective HP pool throughout a round, creating significant advantages in gunfights.
Resurrection: Game-Changing Decision Making
Sage’s ultimate ability is potentially the most impactful in the game, capable of completely reversing round momentum. Using it effectively requires careful consideration:
Resurrection Target Selection
- Value-Based Selection:
- Highest Value: Players with unused ultimate abilities or crucial utility
- High Value: Duelists with strong weapons and mechanical skill
- Situational Value: Players with specific utility needed for current scenario
- Strategic Value: Players with knowledge of enemy positions
- Weapon Consideration:
- Prioritize reviving players with valuable weapons (Operator, Vandal/Phantom)
- Consider the economic impact of saving expensive weapons through resurrection
- Position-Based Selection:
- Resurrect players who died in advantageous positions
- Consider how the resurrected player can immediately impact the round
- Avoid resurrecting players who died in highly exposed positions
Timing Your Resurrection
- Round Phase Timing:
- Early Round: Generally avoid unless it’s an extremely high-value target
- Mid-Round: Use to maintain or regain numerical advantage
- Late Round: Use to create unexpected 2v1 advantages in clutch situations
- Post-Plant: Extremely valuable to strengthen defensive positions
- Safety Considerations:
- Ensure the resurrection area is clear or covered by teammates
- Communicate with your team to cover you during the vulnerable animation
- Consider using your wall to create safe resurrection spots
- Psychological Timing:
- Use resurrection after enemies have committed resources
- Resurrect after enemies believe they’ve secured an area
- Use resurrection to disrupt enemy rotations and create confusion
Post-Resurrection Coordination
- Immediate Directions:
- Communicate immediate threats to the resurrected player
- Call out where they should position after revival
- Share any information they missed while dead
- Resource Maximization:
- If reviving a player with utility, coordinate how to use it
- If reviving a duelist, create space for them to have impact
- If reviving in post-plant, establish defensive positions quickly
- Resurrection Baiting:
- In advanced play, sometimes reveal the resurrection animation to bait enemies
- Have teammates ready to punish enemies who push to stop the resurrection
- Only attempt with proper team coordination
When to Save Resurrection
Sometimes the best decision is to save your ultimate for the next round:
- Economic Considerations:
- Save resurrection in eco rounds where round win probability is low
- Consider saving when the round is already highly favorable
- Use proactively in force-buy rounds to increase win chances
- Map Control Factors:
- Save resurrection when you don’t have control of any death locations
- Save when resurrecting would put both you and the revived player at high risk
- Consider saving when the numerical advantage is already strongly in your favor
Mastering resurrection decision-making takes experience, but following these principles will help you maximize its impact in your matches.
Map-Specific Sage Strategies
Sage’s effectiveness varies across Valorant’s map pool. Here are targeted strategies for each map:
Haven
Defensive Setups:
- A Site: Wall off A Long or A Short depending on enemy patterns
- B Site: Wall off B Main to force window or mid approaches
- C Site: Wall off C Long or create an elevated position in C Garage
Offensive Strategies:
- Use walls to isolate heaven players on A and C sites
- Wall off CT spawn during site executes to prevent quick rotations
- Create boost positions in mid to control the central area
Key Slow Orb Locations:
- A Link to delay rotations
- B Main to gather information
- C Long to slow pushes
Ascent
Defensive Setups:
- A Site: Wall off A Main or create a diagonal wall for off-angles
- B Site: Wall off B Main or boost to Market window
- Mid: Wall off Mid Bottom to prevent pushes or catwalk control
Offensive Strategies:
- Wall off heaven on A site post-plant
- Block CT spawn when executing B site
- Use mid walls to take control of catwalk safely
Key Slow Orb Locations:
- A Main entrance
- B Main/Market entrance
- Mid Courtyard
Bind
Defensive Setups:
- A Site: Wall off A Short or create a boost to see over the boxes
- B Site: Wall off B Long or create a diagonal wall in hookah
- Hookah: Wall yourself up for an unexpected angle
Offensive Strategies:
- Wall off heaven on A site
- Wall off CT on B site for safe plant
- Use walls to block elbow during site executes
Key Slow Orb Locations:
- A Short and A Long entrances
- B Hookah entrance
- Teleporter exits when enemies are rotating
Split
Defensive Setups:
- A Site: Wall off A Main or create a boost to rafters
- B Site: Wall off B Main or create a diagonal wall
- Mid: Wall off Mid to prevent pushes or maintain control
Offensive Strategies:
- Wall off heaven on A site
- Wall off B Heaven during B executes
- Use walls to isolate defenders in back site positions
Key Slow Orb Locations:
- A Ramps
- B Heaven entrance
- Mid to Vents
Icebox
Defensive Setups:
- A Site: Wall off A Main or create a boost onto pipes
- B Site: Wall off B Main or create a wall between default plant and yellow
- Mid: Wall off Mid to maintain yellow control
Offensive Strategies:
- Wall off screens on A site
- Create safe plant spots on B site with strategic walls
- Use walls to block common sniper positions
Key Slow Orb Locations:
- A Main entrance
- B Green
- Mid Boiler area
Fracture
Defensive Setups:
- A Site: Wall off A Main or create a diagonal wall from dish
- B Site: Wall off arcade or tower approach
- Rope Areas: Wall off rope access points to delay pushes
Offensive Strategies:
- Wall between site and spawn on A
- Block tower vision on B site
- Use walls to secure drop control
Key Slow Orb Locations:
- A Dish entrance
- B Tower area
- Rope exits
Lotus
Defensive Setups:
- A Site: Wall off A Main or create a boost position
- B Site: Wall off main entrance or create a diagonal wall
- C Site: Wall off C Main or create an elevated position
Offensive Strategies:
- Wall off CT spawns during executes
- Create safe plant spots with strategic walls
- Use walls to control rotating door areas
Key Slow Orb Locations:
- A Main entrance
- B Main entrance
- C Main entrance
By adapting your Sage play to each map’s unique geometry, you’ll maximize her effectiveness and surprise enemies with unexpected utility usage.
Playing Sage in Different Team Compositions
Sage’s playstyle should adapt based on your team composition:
With Aggressive Comps (Multiple Duelists)
In aggressive compositions:
- Focus on following duelists to trade and heal
- Save resurrection for key duelist players
- Use walls to help secure space after your duelists take initial control
- Play slightly more passively to balance the team’s aggression
With Defensive Comps (Multiple Sentinels)
In defensive compositions:
- Focus on using slows to gather information
- Coordinate wall usage with other sentinel utility
- Be more liberal with self-healing as you may take more duels
- Consider more aggressive resurrection usage since site holds are stronger
With Controller-Heavy Comps
In controller-focused compositions:
- Use walls to complement smoke setups
- Focus healing on controllers holding key positions
- Use resurrection to maintain site control post-plant
- Coordinate slow orbs with smoke timings for maximum effect
With Initiator-Focused Comps
In initiator-heavy compositions:
- Heal initiators after they use self-damaging utility
- Wall off areas to funnel enemies into initiator utility
- Use slow orbs to make enemies vulnerable to initiator abilities
- Time resurrection with initiator information-gathering to maximize safety
Adapting to your team composition is crucial for maximizing Sage’s impact. Communication with your team about how you plan to use your utility will help create synergistic gameplay.
Solo Queue vs. Team Play Differences
Playing Sage varies significantly between solo queue and coordinated team environments:
Solo Queue Approaches
In solo queue (especially at lower to mid ranks):
- Be more self-sufficient with wall usage
- Don’t hesitate to self-heal when needed
- Use resurrection more conservatively, focusing on safe revivals
- Communicate heal availability clearly to random teammates
- Consider more aggressive wall boosts to create your own advantages
Team Play Optimization
In premade teams or higher-level coordinated play:
- Coordinate wall timings with team executes
- Develop predetermined wall setups for specific strategies
- Establish healing priority systems with your team
- Plan resurrection usage around team utility and positioning
- Use walls to enable specific teammates’ playstyles
Communication Differences
- Solo Queue Communication:
- Keep callouts simple and clear
- Announce heal and resurrection availability
- Call when you’re using wall for specific purposes
- Ask injured players to fall back to you for healing
- Team Play Communication:
- Develop shorthand callouts for common wall placements
- Coordinate utility timing with specific countdown calls
- Call healing rotations based on team strategy
- Plan resurrection targets before rounds start
For improving your team coordination, consider joining Valorant Discord communities where you can find like-minded players to develop Sage strategies.
Sage’s Evolution in the Meta
Sage has undergone significant changes since Valorant’s release. Understanding her evolution helps you adapt to future meta shifts:
Historical Context
- Launch Sage (2020): Incredibly powerful with faster healing, stronger walls, and more impactful slows
- Post-Nerf Sage (Late 2020): Reduced healing speed, wall health, and slow effectiveness
- Adaptation Era (2021): Players developed more creative wall usage to compensate for nerfs
- Current Sage (2023): Balanced but still essential in many compositions
Current Meta Position
In today’s meta, Sage remains valuable but is no longer considered mandatory on every map. Her strengths include:
- Map Specificity: Particularly strong on Split, Icebox, and Bind
- Composition Flexibility: Works in both aggressive and defensive team comps
- Utility Uniqueness: Still the only agent with resurrection and direct healing
For context on how professional teams are using Sage in current competitions, check out our VCT 2025 coverage to see the latest strategic innovations.
Adapting to Meta Shifts
To stay effective as Sage through meta changes:
- Study Professional Play: Watch how top teams like MIBR use Sage in competitive matches
- Experiment with New Wall Placements: As maps get updated, find new creative positions
- Adjust to New Agent Interactions: Learn how Sage interacts with newly released agents
- Stay Flexible: Be prepared to adapt your playstyle as balance changes occur
Sage’s Gunplay and Positioning
While Sage’s abilities are powerful, your fundamental gunplay and positioning are equally important:
Weapon Recommendations
- Primary Weapons:
- Vandal/Phantom: Standard rifles work well with Sage’s mid-range positioning
- Operator: Can be effective when using wall boosts for unexpected angles
- Spectre: Solid choice for half-buy rounds when you need wall
- Secondary Preferences:
- Sheriff: Good for eco rounds while still purchasing wall
- Ghost: Balanced option that works well with Sage’s mid-range positioning
- Economy Considerations:
- Prioritize wall purchase over weapon upgrades on tight buys
- Consider light shields + wall over full shields without wall
Positioning Fundamentals
- Defensive Positioning:
- Play from positions where you can fall back after contact
- Position to maximize wall value when enemies push
- Hold angles where teammates can easily peek to trade if you die
- Offensive Positioning:
- Stay close enough to duelists to heal but not so close you’re trading 1-for-1
- Position to quickly wall off retake paths after plant
- Play slightly more passively to ensure resurrection value
- Crosshair Placement:
- Maintain head-level crosshair placement at all times
- Pre-aim common positions where enemies might appear after your wall
- When using boost walls, adjust crosshair placement for unusual angles
For improving your aim mechanics to complement your Sage utility, check out our guide on legitimate Aimbot Valorant training techniques (not actual cheats).
Common Mistakes to Avoid
Even experienced Sage players make these common mistakes:
- Heal Hoarding:
- Waiting too long for the “perfect” heal opportunity
- Not using heal because you want to save it for yourself
- Solution: Use heal more liberally; it regenerates
- Predictable Wall Placements:
- Using the same wall spots every round
- Placing walls too early, allowing enemies to adjust
- Solution: Vary your wall placements and timing
- Unsafe Resurrections:
- Resurrecting in the open without cover
- Resurrecting teammates who died in highly contested areas
- Solution: Create safe resurrection opportunities with walls or team utility
- Passive Playstyle:
- Playing too far back to use utility effectively
- Not taking duels when appropriate
- Solution: Find the balance between supportive play and taking initiative
- Poor Slow Orb Usage:
- Throwing both slows immediately at round start
- Using slows that are easily avoidable
- Solution: Use slows reactively or to cut off rotations
Avoiding these mistakes will immediately improve your Sage gameplay and increase your impact on rounds.
Sage’s Future in Valorant
As Valorant continues to evolve, Sage’s role may change. Here are some considerations for the future:
Agent Pool Expansion
As new agents are released, Sage’s unique healing role may be complemented or challenged:
- Watch for new support-oriented agents that might pair well with Sage
- Adapt your Sage play to work with emerging meta compositions
- Stay aware of how new agents interact with Sage walls and slows
Platform Considerations
With Valorant Console development underway and questions about Valorant crossplay emerging, consider how Sage might function differently:
- Wall placement may require different techniques on controller
- Healing might need different targeting systems
- Resurrection mechanics might be adapted for console play
Staying Updated
To keep your Sage gameplay current:
- Follow patch notes for any ability adjustments
- Watch professional players for new techniques
- Experiment with wall placements on map updates
- Join community discussions about emerging strategies
Personalizing Your Sage Experience
Beyond gameplay, there are ways to enhance your personal Sage experience:
Cosmetic Considerations
While cosmetics don’t affect gameplay, they can enhance your enjoyment:
- Consider Sage-specific skins that you find visually appealing
- Check the Valorant Night Market for potential deals on Sage skins
- Review your Valorant Purchase History before investing in new cosmetics
For players interested in the aesthetic side of Valorant, our guide to Kitty Valorant Skins showcases some popular options that work well with all agents, including Sage.
Identity Customization
Make Sage your own with:
- A unique Valorant Name Change that reflects your Sage playstyle
- Player cards and titles that complement your identity as a Sage main
- Gun buddies that match your Sage skin selections
Conclusion: Becoming an Exceptional Sage
After over 1,000 hours in Valorant and climbing to Diamond 2, I’ve seen how truly impactful a masterful Sage can be. The difference between an average Sage who simply heals and a great Sage who controls space, enables teammates, and clutches rounds is immense.
To summarize the key points for mastering Sage:
- Utility Creativity: Constantly innovate with wall placements and slow orb usage
- Decision Making: Develop strong healing priority systems and resurrection judgment
- Adaptability: Adjust your playstyle based on map, team composition, and enemy patterns
- Communication: Clearly convey your utility availability and coordinate with teammates
- Fundamentals: Maintain strong gunplay and positioning to complement your utility
Remember that Sage’s true power comes not just from her healing but from her ability to control space, enable teammates, and create unexpected advantages. By mastering the techniques in this guide and developing your own creative approaches, you’ll transform from a passive healer into a game-changing force that enemies fear and teammates appreciate.
Whether you’re just starting your Valorant journey or looking to add Sage to your agent pool as an experienced player, I hope this guide helps you unlock her full potential. Good luck on the battlefield, and may your walls be creative, your heals timely, and your resurrections game-changing!
– Jackober, Diamond 2 Valorant Player


2 comments
Pingback: Valorant Ranks: The No-BS Guide to Climbing and Flexing in 2025 - Valorant Insights
Pingback: Jett Valorant: Mastering the Wind Assassin - Valorant Insights